
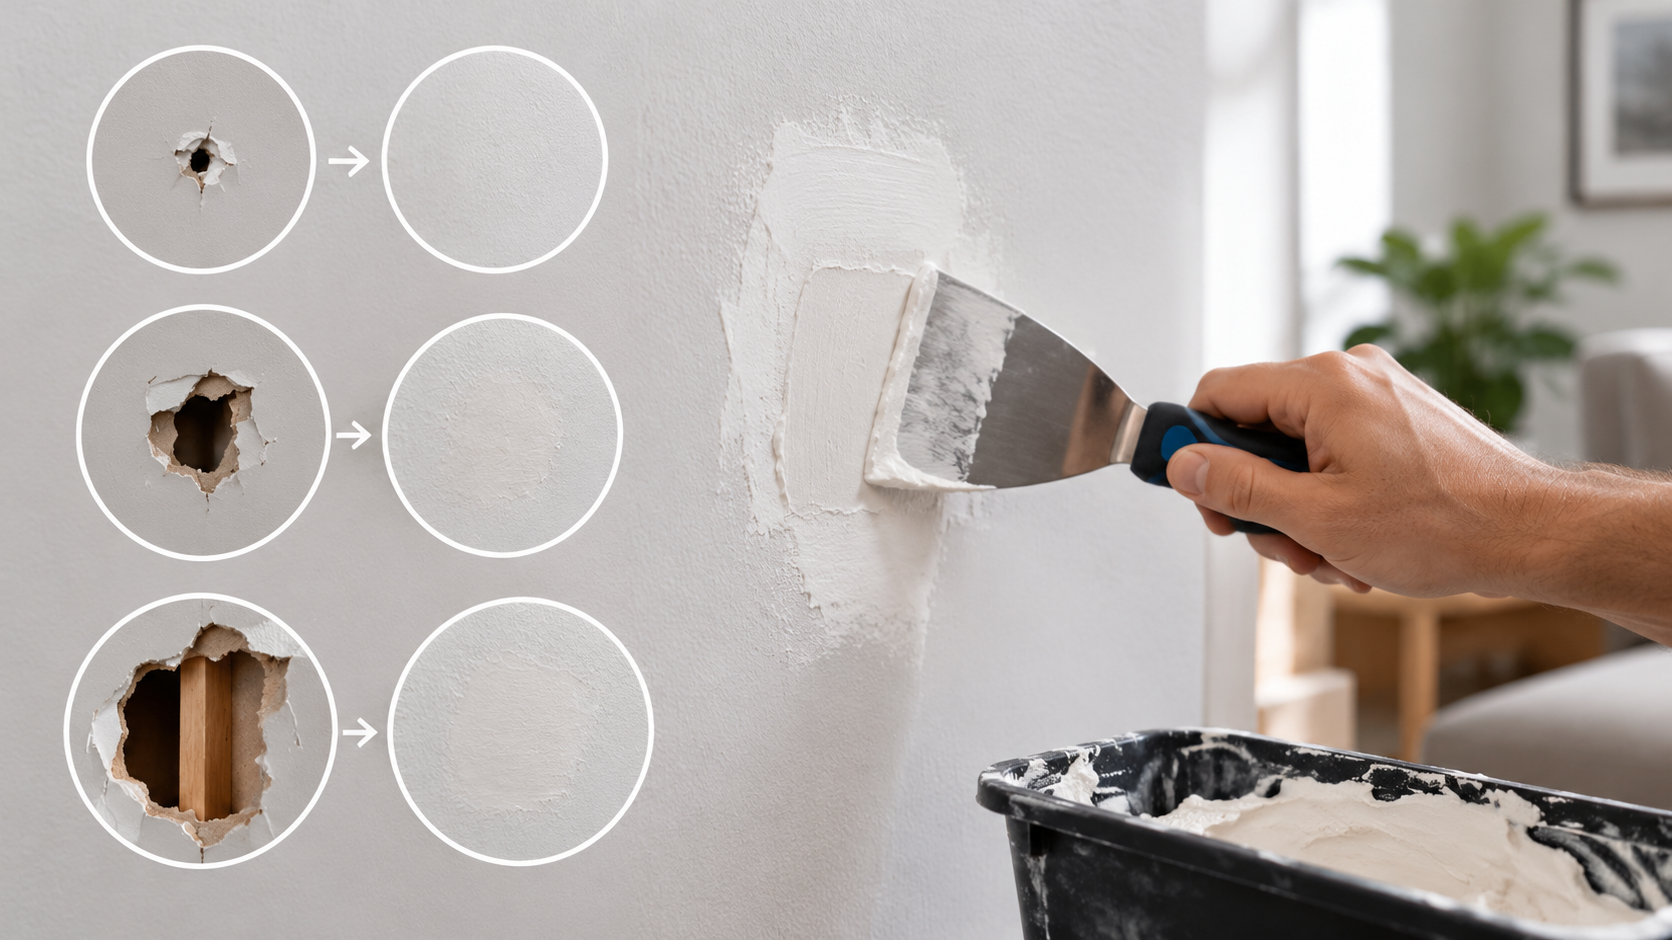
A doorknob went through the wall, an old anchor pulled out a chunk of gypsum, or you took down pictures and found a row of nail holes. Working out how to patch a hole in drywall starts with one measurement, because the size of the hole decides the method. Every repair then runs in the same order: fill or patch, apply thin coats of compound, sand, prime and paint. Get that order right and you know how to fix a hole in drywall of almost any size.
This guide covers how to size up the hole, three step-by-step methods, how to make the patch disappear, which filler to buy, and when the job is better handed to a pro.
How Do You Patch a Hole in Drywall?
Match the method to the hole size. Fill nail and screw holes with spackle. Cover holes up to about 5-6 inches with a self-adhesive mesh patch. For anything larger, cut out the damage, add wood backing and screw in a new piece of drywall. Every method finishes with thin coats of spackle or joint compound, sanding, primer and paint.
Use the table below to find your hole size and jump straight to the right method.
Which Repair Method Fits Your Hole?
Measure the hole at its widest point, including any torn paper or crumbled gypsum around it. The best way to patch a hole in drywall depends on that number, not on how bad the hole looks.
| Hole size | Method | What to buy | Coats | Time | Go to |
| Nail and screw holes, dings | Spackle | Lightweight spackle, 4-inch knife, fine sanding sponge | 1-2 thin | One short session, plus drying before paint | Small-hole steps |
| Up to about 1/2 inch (old anchors, small dents) | Spackle, or one coat of joint compound | Spackle or lightweight compound, 4-inch knife | 2 | One short session, plus drying before paint | Small-hole steps |
| About 1/2 to 6 inches (doorknob holes, a 2-3 inch hole) | Self-adhesive mesh patch or California patch | Mesh patch or drywall scrap, joint compound, 6-inch knife | 2-3 | Spread over two or more sessions, because each coat must dry | Mesh patch or California patch |
| Over about 6 inches (impact damage, old fixture cut-outs) | Cut-out with backing and a new drywall piece | Drywall scrap, wood strips, screws, tape, compound, 10-12 inch knife | 3 plus taping | Spread over two or more sessions, because each coat must dry | Large-hole steps |
How big a hole can you patch yourself? Most homeowners can handle anything up to doorknob size, and many can manage a large cut-in piece with some patience. DIY stops making sense when the drywall is water-damaged, the same spot keeps getting hit, the hole is in a ceiling, or there’s wiring or plumbing behind it. Those cases are covered in When to Call a Pro.
Popped nails are a small repair, not a hole. Drive a drywall screw into the stud about 1-2 inches from the nail to pull the board tight. Then “set” the nail by tapping it just below the surface with a hammer, and treat both spots as nail holes.
Before You Start: Check, Prep and Gather Your Tools
Five minutes of checking saves you from patching over a live wire or a wet wall. In Florida, the second is more common than people think.
Check What’s Behind the Wall
Shine a flashlight into the hole before you cut anything. If you plan to enlarge the opening, run a stud finder over the area first so you know where the framing sits.
Assume wiring runs near outlets and switches, often straight up or down from them. Cut shallow with a drywall saw (a jab saw: a short, pointed saw made for gypsum) and never plunge it deep. If you see wires in the way, stop and get a licensed electrician’s help with wiring.
Walls shared with a kitchen or bathroom often hide supply and drain lines. A saw blade that nicks a pipe turns a wall patch into a leak. If a pipe sits where you need to cut, stop there and arrange plumbing repairs in Bradenton, or call a plumber near you, before you cut.
Florida Moisture Check: Soft, Stained or Musty Drywall
Press around the hole with your thumb. Drywall that is soft, crumbly, swollen, stained brown or yellow, or smells musty is holding moisture, and the hole may be a symptom rather than the real problem.
In our humidity, the usual sources are a clogged or leaking AC condensate line, a roof or window leak, and wind-driven rain. If the stain showed up after bad weather, checking your home after a storm will help you find where the water got in.
Fix the source first and let the area dry completely. Then cut the damaged drywall back to solid, dry board instead of patching over it. A patch on damp gypsum fails, and water stains bleed through fresh paint. If you see visible mold, stop: that is not a DIY patch job.
Older Homes and Sanding Dust
If your house was built before 1978, be careful, because homes built before 1978 may have lead-based paint, and sanding or cutting it creates hazardous dust. Keep sanding to a minimum and smooth with a damp sponge where you can. Wear a dust mask and lay down a drop cloth. If you’re unsure about the paint, have it tested before you start, and don’t sand it until you know.
Tools and Materials Checklist
Here is one shopping list, grouped by job size. Spackle and joint compound are the two kinds of drywall hole filler you’ll choose between; the filler comparison further down explains which suits your hole.
All jobs
· 4-inch and 6-inch putty or taping knives: the narrow one fills, the wide one feathers.
· Lightweight spackle: for nail holes and small dents, because it barely shrinks.
· All-purpose or lightweight joint compound (premixed tub): for coating patches and seams.
· Fine-grit sanding sponge or 120-150 grit paper: smooths without tearing the face paper.
· Primer: seals the repair so paint dries evenly over it.
· Matching paint: ideally leftover from the original job.
· Drop cloth: compound and dust travel further than you expect.
· Flashlight: for looking into the hole and checking your finish.
· Dust mask: sanding dust is fine and stays airborne.
Medium holes, add
· Self-adhesive mesh or aluminum patch, or a drywall scrap for a California patch: bridges the gap.
· Utility knife: trims torn paper and scores drywall.
Large holes, add
· Drywall saw: cuts the opening square.
· Scrap drywall the same thickness as the wall: measure at the edge of the hole.
· 1×3 or 1×4 wood strips: backing to screw the new piece into.
· Drywall screws and a drill: fasten the backing and the patch.
· Paper or mesh tape: reinforces the seams.
· A 10-12 inch knife: for the final wide coat.
Textured walls, add
· Spray or roller texture matched to your wall: so the patch doesn’t read as a smooth square.
If that list is longer than your patience, read up on the jobs worth handing to a handyman before you buy anything.
Small Holes and Nail Holes: Fill With Spackle
This is the one repair that needs no patch, and the one most people overdo. These steps show how to patch a small hole in drywall, and they’re also how to patch nail holes in drywall after taking down a gallery wall or moving out of a rental.
Can you fix a hole in drywall without a patch? Yes, for nail, screw and anchor holes up to about 1/2 inch. Anything wider has nothing behind it to hold the filler, so it will crack or sink without a patch or backing.
1. Clean up the edges. Knock down raised edges and loose paper with your knife or a light sanding. Pull out any old anchor, or push it just below the surface.
2. Fill. Press spackle into the hole with a 4-inch knife, working it in from two directions so it packs tight.
3. Scrape flush. Make one firm pass across the hole. Leave a thin film, not a mound.
4. Let it dry. Check the label: lightweight spackle dries fast, but deeper fills take longer. Spackle can shrink in deeper holes, so add a second thin coat if it dipped.
5. Sand. Sand lightly with a sponge until flush. Run your fingertips over it rather than judging by eye.
6. Prime and paint. Spot-prime the repair, then paint.
The fastest route: for a small hole, lightweight spackle is the quickest fix and is often finished the same day. The honest limit is drying time: you still wait until it’s fully dry before priming and painting, and the label sets that time.
Mistakes to avoid
· Loading a thick blob, which shrinks and cracks as it dries.
· Sanding hard and scuffing the paper around the hole.
· Painting without primer, so the spot shows as a dull or shiny dot.
Medium Holes up to About 6 Inches: Mesh Patch or California Patch
Doorknob holes and the 2-3 inch hole left by an old fixture are too big to fill, so you need something to bridge the gap. Two methods work: a self-adhesive mesh patch is the quickest, while a California patch sits flatter and needs no backing but takes more patience. Either one answers how to fix a hole in drywall at this size; choose by how flat the finish needs to be.
Option 1: Self-Adhesive Mesh Patch
This is the fastest DIY method for holes between about 1/2 inch and 6 inches.
7. Trim loose paper and crumbled gypsum. Lightly sand any gloss around the hole so the compound grips.
8. Center the patch so it overlaps solid wall by at least an inch on every side, then press it flat.
9. Apply a first thin coat of joint compound over the patch, pressing it through the mesh.
10. Let it dry fully.
11. Apply a second coat wider, feathering it several inches past the patch edge. Feathering means thinning the compound to nothing at the edges so there’s no ridge.
12. Add a third skim coat if needed, then sand, prime and paint.
A mesh patch is quick, but it adds thickness to the wall. Hiding the edge takes a wide, well-feathered coat; a narrow coat leaves a visible bump.
How do you fix a 2-inch hole? Use a self-adhesive mesh patch and two or three thin coats of compound.
Aluminum patches are the stiffer version, and they’re worth it for spots that take knocks, such as the wall behind a door. Fit a door stop at the same time so you’re not patching it again next year.
Option 2: California Patch
A California patch is a piece of drywall with a paper flange left on its face. The paper bonds into the compound like tape, so no backing is needed.
13. Square up the hole with a drywall saw.
14. Cut a scrap piece about 2 inches larger than the hole on every side.
15. On the back, draw the size of the hole. Score and snap the gypsum along that line, then peel the gypsum away outside it. Keep the face paper intact so it forms the flange.
16. Butter the edges of the hole, and the wall where the flange will sit, with compound.
17. Press the piece in. Squeeze excess mud out from under the paper, working from the center outward.
18. Skim a thin coat over the flange.
19. Let it dry. Apply two more feathered coats, then sand, prime and paint.
This method finishes flatter than mesh because the paper adds almost no thickness. The common failure is air bubbles under the paper, which come from not squeezing the mud out firmly enough in step 5.
How to Patch a Large Hole in Drywall?
For anything bigger than your hand, you replace the drywall rather than cover it.
20. Check, mark and cut. Check behind the wall first (see the prep section above). Draw a square or rectangle around the damage and cut it out with a drywall saw.
21. Install backing. Cut two wood strips a few inches longer than the opening. Slide them inside and screw them through the drywall so they bridge the opening, top and bottom or side to side. If an edge of your cut lands on a stud, screw to the stud instead.
22. Cut the new piece. Use drywall the same thickness as the wall and test the fit. A gap of about 1/8 inch around it is fine.
23. Screw it in. Fasten the piece to the backing. Set each screw head just below the surface without tearing the face paper.
24. Tape the seams. Tape all four seams with paper tape bedded in compound, or with mesh tape. Paper tape doesn’t stretch, so it makes stronger seams that are less likely to crack; mesh is easier to apply but weaker.
25. Coat. Apply 2-3 coats, each wider than the last, using the 10-12 inch knife on the final coat. Let every coat dry fully.
26. Finish. Sand, prime, match the texture, then paint.
On big repairs, setting-type compound helps. It’s mixed from powder and hardens by chemical reaction within the working time printed on the bag, rather than by drying. That makes it good for a fast, hard first coat, but it’s harder to sand, so finish with premixed compound.
Knowing how to patch a large hole in drywall doesn’t mean every large hole is a DIY job. A ceiling, a whole damaged panel, water-damaged framing, or wiring and plumbing in the cavity all point to calling a pro.
Finishing So the Patch Disappears
The patch itself is the easy part. Whether anyone notices it later comes down to sanding, primer and texture, and that’s where many guides on how to repair a hole in drywall stop short.
Sanding and Feathering
Sand lightly with a fine sponge. Then check the patch with raking light: hold a flashlight flat against the wall so the beam skims across the surface and shows every ridge and dip.
Fill any dips with a thin skim coat and sand again. If you sand through the face paper and it fuzzes up, seal it with primer before adding more mud, or the fuzz will show through.
Priming and Painting
Unprimed compound absorbs paint differently from the wall around it, so the patch shows up as a dull or shiny spot. Painters call this flashing, and the cure is to always prime the repair. Over any water-stained area, use a stain-blocking primer.
With flat paint, a touch-up usually blends. With eggshell or satin, paint the wall corner to corner, because differences in sheen show. Use leftover paint from the original job, or take a paint chip to the store for matching.
Matching Wall Texture
Most walls are smooth, orange peel (a fine, bumpy spatter) or knockdown (spatter flattened into small plateaus). Spray-can texture takes practice, so test on cardboard first and use lighter passes than you think you need.
For knockdown, flatten the spatter with a wide knife once it starts to set. Prime after texturing, then paint. Heavily textured walls and ceilings are one of the most common reasons to call a pro.
Mistakes That Give a Patch Away
· Skipping primer: the patch flashes through the paint.
· Feathering too narrow: the edge shows under raking light.
· One thick coat instead of 2-3 thin ones: it cracks, shrinks and takes days to dry.
· Recoating too soon: wet compound underneath bubbles and stays soft.
· Sanding too hard: it tears the face paper and leaves fuzz.
· Skipping texture matching: a smooth square on a textured wall stands out from across the room.
The filler you pick decides how many coats you apply and how much sanding you do.
Joint Compound vs Spackle, and Which Patch to Use
Joint compound vs spackle is the question most people ask standing in the store aisle, and the answer depends on the hole. Here’s how the fillers and patches compare.
Spackle is a ready-to-use filler that dries fast with little shrinkage. It’s right for nail and screw holes and small dings, but it’s expensive and weak over large areas. Joint compound (drywall mud) is cheaper per volume and made for taping seams and coating patches; it takes several thin coats and sanding. Lightweight compound sands more easily, which is why many handymen use it for finish coats. Setting-type compound is the fast, hard option for deep fills.
| Filler or patch | Best hole size | Skill level | Dry and sand time* | Strength | How invisible | Best for |
| Spackle | Nail holes up to about 1/2 inch | Beginner | Fastest | Low over large areas | Very, if primed | Nail, screw and anchor holes |
| Joint compound with tape | Seams and patch coats | Intermediate | Slow | High with tape | Very, if feathered wide | Seams and coating every patch |
| Self-adhesive mesh patch | About 1/2 to 6 inches | Beginner | Moderate | Medium | Good, with wide feathering | Doorknob holes when speed matters |
| Aluminum patch | About 1/2 to 6 inches | Beginner | Moderate | High | Good, with wide feathering | Spots that get hit again |
| California patch | About 1/2 to 6 inches | Intermediate | Moderate | Medium to high | Very, sits flattest | Medium holes on smooth walls |
| Cut-in drywall piece with backing | Over about 6 inches | Intermediate to advanced | Slow | Highest | Very, with taping and texture | A large drywall patch; the strongest repair |
*Relative only. Check the product label for actual drying times.
The pick for each size:
· Nail and screw holes: lightweight spackle.
· Up to 1/2 inch: spackle.
· 1/2 to 6 inches: a mesh drywall patch, or a California patch for the flattest finish.
· Over 6 inches: a cut-in piece with backing, taped and coated with joint compound.
What’s the best filler for holes in drywall? Spackle for small holes, joint compound for anything you patch or tape. The best spackle for drywall nail holes is a lightweight one, because it barely shrinks and sands easily.
Not sure which you need? Take a photo of the hole, with the measurement, to the store and match it to the table above.
Do You Need a Drywall Patch Kit?
Only sometimes. A drywall patch kit is convenient for one medium hole when you own nothing: it typically bundles a patch, a small tub of compound and a mini knife.
If you already have a putty knife, a single mesh patch and a small tub of compound do the same job, and the leftovers cover the next hole. Kits also vary in quality. The small plastic knives in many of them flex and make feathering harder, which is exactly the step that hides the patch.
Kits don’t help with large holes at all. For those you need a drywall scrap, backing strips and tape.
DIY or Hire a Handyman?
Most holes are DIY-able. The real question is whether the time, tools and finish quality are worth it to you.
· Time: several thin coats with drying in between means a medium patch spans more than one session.
· Tools: whether you already own knives, a drywall saw and a drill.
· Skill: feathering and texture matching are the hard parts, not the patch.
· Finish: how invisible it must be, for example before a home sale or a rental move-out inspection.
| DIY is fine | Consider hiring |
| Nail holes | Large or repeated damage |
| Anchor holes | Water damage |
| Doorknob dents | Textured walls or ceilings |
| One small or medium patch on a smooth wall | Wiring or plumbing behind the wall |
| Several holes plus painting before a deadline |
Can a handyman patch drywall? Yes. Patching and painting small to medium areas is typical handyman work, and a typical handyman drywall repair covers the patch, the coats, texture and paint. Larger repairs that involve framing, water damage or other trades may need a contractor, and it helps to know when a general contractor makes more sense.
Some situations make hiring the clearly sensible call, and they’re worth knowing before you cut.
When to Call a Pro for Wall Repair
Some holes are a sign of a bigger problem, and patching over them just hides it for a season. Here’s what to watch for, what affects the price, and how to get local help.
Signs the Job Has Outgrown DIY
· The damage is bigger than one cut-in patch, or the same spot keeps cracking. Repeat cracking points to movement or a loose fastener, not just a hole.
· The area is soft, stained or musty. In Florida’s humidity, that means moisture or mold.
· The hole is in a ceiling, or the surface is heavily textured. Overhead work and texture matching are where DIY patches most often show.
· Wiring or plumbing could be behind it. Cutting blind into a service cavity isn’t worth the risk.
What Drives the Cost of a Drywall Repair
Drywall repair cost depends mostly on the job, not the hole alone:
· Hole size and the number of holes.
· Texture matching.
· Ceiling vs wall.
· Spot painting vs painting the full wall.
· Any moisture repair needed first.
For a broader picture, see what hiring a handyman in Bradenton costs. At Shoreline, what we quote is what you pay, barring any changes we discuss with you first, and we offer free estimates for straightforward jobs.
Getting Help in Bradenton, Manatee and Sarasota County
Shoreline Handyman & Home Watch is a family-owned local option serving Bradenton, Manatee and Sarasota County. Our pledges are simple: fast response, honest pricing, and work done right the first time.
You can tell us what needs fixing through our Bradenton handyman service page or call +1 941-414-2835.
If it’s easier to send a message with photos and a measurement, you can also get in touch about your wall through our contact page.
Frequently Asked Questions
How big a hole can you patch in drywall?
Practically any size. Up to about 6 inches, a patch does the job; past that, you fit a new piece over backing. The real limits are moisture, ceilings and services behind the wall.
What is the best filler for holes in drywall?
Spackle suits nail holes and small dents. Joint compound is the right choice for covering patches and taping seams.
What is the fastest way to fix a hole in the wall?
Lightweight spackle for small holes, and setting compound for a quick first coat on bigger ones. Either way, drying before primer and paint sets the pace.
Can you fix a hole in drywall without a patch?
Yes, if it’s about 1/2 inch or smaller. Wider holes need a patch or backing behind the filler.
How do you fix a 2-inch hole in drywall?
Cover it with a self-adhesive mesh patch, apply two or three feathered coats of compound, then sand, prime and paint.
Key Takeaways: Patching Drywall Holes
Learning how to patch a hole in drywall is mostly about matching the method to the size: spackle for small holes, a mesh or California patch for medium ones, and a cut-in piece with backing for anything larger. Thin coats, wide feathering, primer and matched texture are what make the repair disappear. In Florida homes, press around the hole and check for moisture before you patch anything.
If the hole is in a ceiling, keeps coming back, or sits over water damage or wiring, Shoreline Handyman & Home Watch can take a look and tell you what it needs.